Friday, July 13, 2012

Southwest chicken Chowder (with black beans and corn) in a crockpot


Southwest Chicken Chowder over rice. It's got corn and black beans and tomatoes and peppers in it...So Yummy and very healthy too!  
I am trying to ignore the weeding in my garden I need to do today. I'm still in my jammies reading a dieting book while watching "The Doctors" on T.V. talk about how we need to stop eating sweets and diet soda. 
I refrigerate the chowder, and the next day I use it as filling for Burritos! Just add some cheese!


Gosh, I thought diet soda was better than drinking sugary regular soda. But they said it makes you crave sugary sweets. THAT must be my PROBLEM!! Cuz I crave sweet pies, cakes and cookies in actuality every day! Stupid diet soda!! 

Add a spoon of sour cream on top and some tortilla chips! 


So I went looking for some healthy ingredients in my fridge and freezer to cook up something spicy and southwestern tasting. Here it is!! It is very healthy and low calorie, but really filling and yummy. My hubs raved about this stuff I made up.  It has a lot of ingredients, but use substitutes if you need to. It doesn't matter that much.  You can also add more spice to it if you like "hot" flavor.  This is great for burrito filling the next day as it thickens up.  I serve it over rice. It's great to use up some of your garden tomatoes and peppers too. 


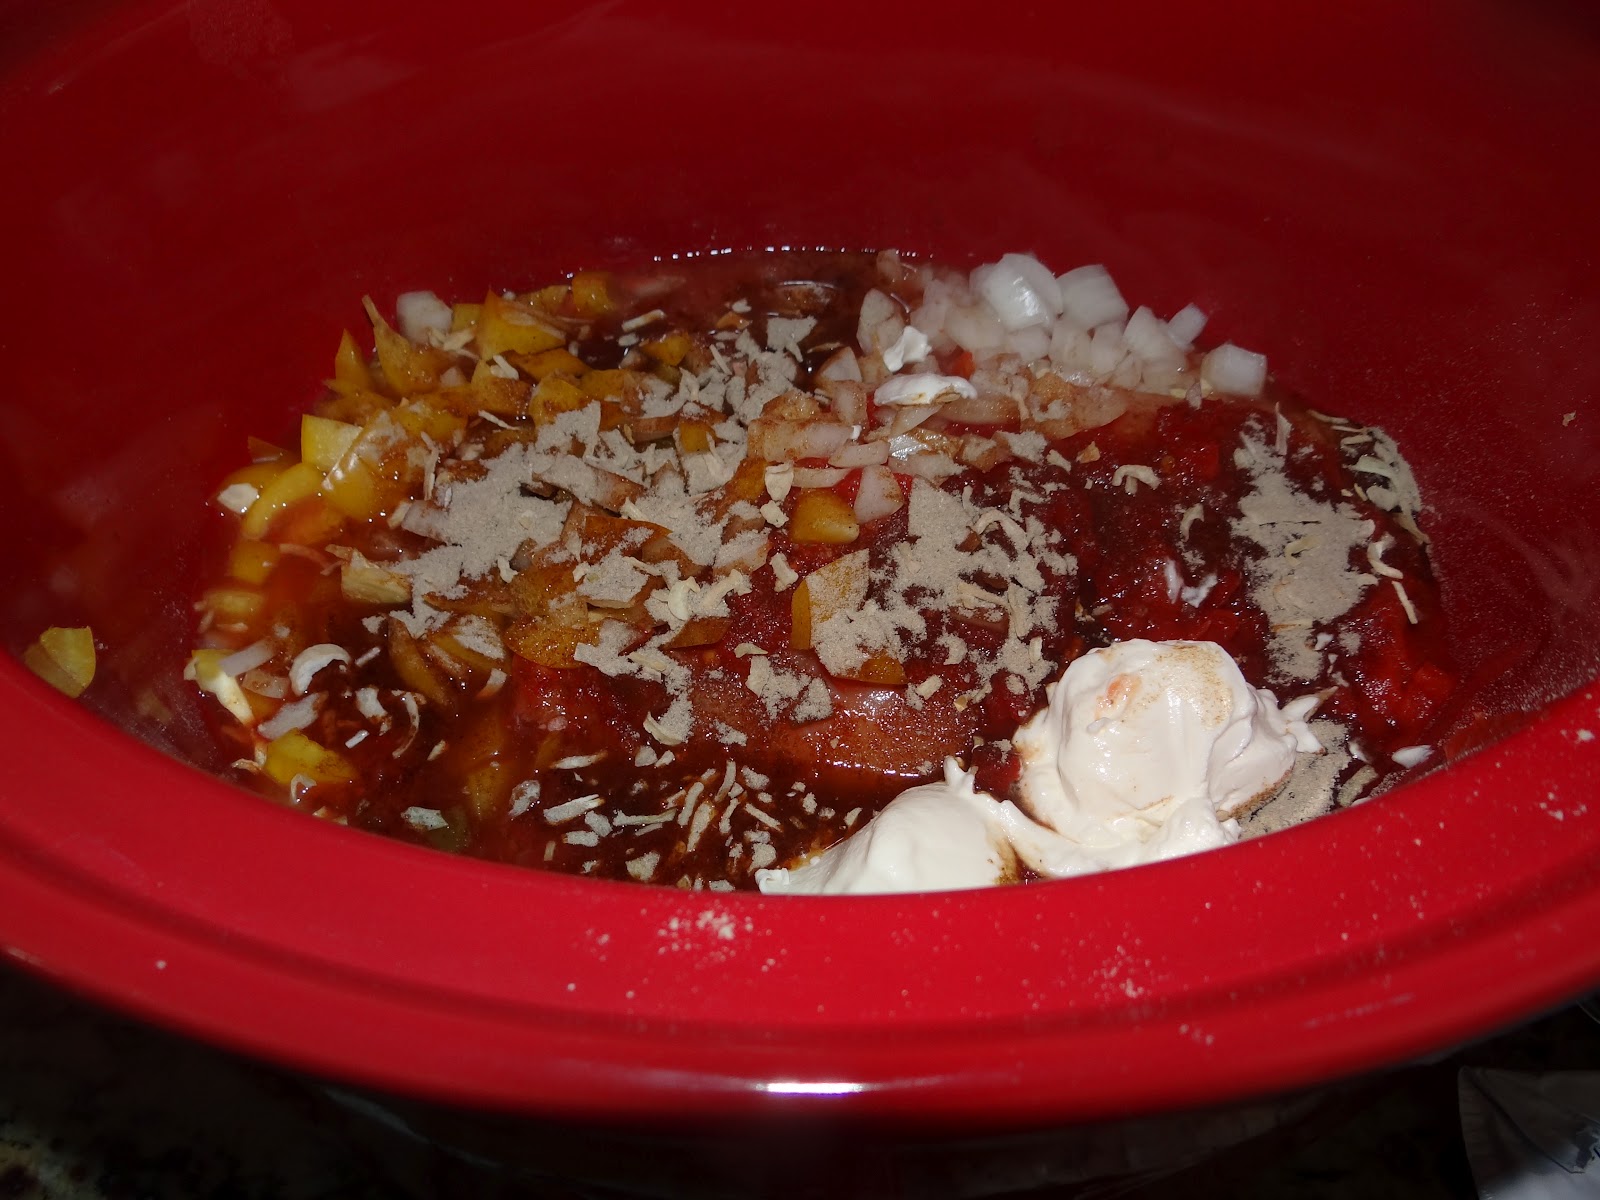
Chop up the onion and peppers, and just dump the chicken breasts and the other things in your Crock Pot! So Easy! 

I used a leftover jar of salsa in mine, you could use picante sauce if that's all you have though...

Fresh and frozen and canned veggies make up this yummy Southwest Stew! 
SOUTHWEST CHICKEN CHOWDER (with black beans and corn) in a CROCKPOT
4 chicken breasts
1/3  green pepper diced
1/2 yellow or orange pepper diced ( I LOVE these!)
1 medium  onion diced 
1 cup salsa plus 1/2 cup water
1 (15 oz) can of diced tomatoes with juice (or 3 fresh tomatoes diced)
2 Tablespoons lime juice
1/3 cup brown sugar
1 package Lipton Onion Soup Mix
1 tsp chili power (or more if you like it spicy)
a few shakes of ground black pepper 


AN  HOUR BEFORE YOU WANT TO SERVE IT ADD....

1 1/2 cups frozen  corn
1 (15 oz) can black beans with juice (just so they won't be mushy)

3 Tablespoons sour cream (it makes it so lovely and creamy)
2 Tablespoons of flour (if you want more thickening)


Spread over white rice   
This makes enough for an army or for a family of 4 for 2 meals plus a leftover take to work lunch for you or the hubs!  
Just dump all the ingredients into a crock pot and set on high for 4 hours...or low for 6 hours. 

An hour before it's done add the corn and black beans and some flour if you want thicker  chowder.
Also, take out the chicken and shred or cut it up into bite size pieces an hour before serving. I like mine in diced up pieces. 
Finished Southwest Chicken Chowder....Top with chips and sour cream, and serve over rice. 


Serve over rice  and add some tortilla chips to the side,  or in a warm, flour tortilla with some cheddar cheese. Yum. I just dump the leftover rice into the crock pot before putting it in containers for the fridge. 


For the burritos add the rice into the chowder. Use it for Burrito fillings the next day for lunch...just add some cheddar cheese!

I added some sour cream to mine after it was warmed up...you could also add guacamole.....


I usually do the flour tortillas the next day as leftovers because this stew gets thicker overnight in the fridge and is perfect filling for a Southwest burrito the next day. It is great in a Tupperware container for lunch with some tortilla chips the next day too.

Tuesday, July 10, 2012

Dutch Oven or Crock Pot Pulled Pork

Dutch Oven Pulled Pork....so yummy!
I think dutch oven cooking is fun okay? It is a LOT of work when you are camping, but it is simply fun to watch the pots covered with coals do their thing. And kids love dutch oven stuff. It's a great family "making memories" time. I would do it in the backyard on a cookie sheet if I don't like to camp.
But if you don't like outdoor cooking, try some pulled pork from the crock pot. Either one is really so delicious.

Tools for Dutch Oven Cooking.....
Pork Ribs we bought from Costco....So we didn't have to pull apart the meat....they are cut already so they just fall apart in the cooking process....

Just dry rub and season with salt, pepper, garlic and onion powders and some brown sugar....
Here are 3 recipes for dry rub. Take your pick. Each makes about a cup of dry rub. 
  • 2 tablespoons salt
  • 2 tablespoons sugar
  • 2 tablespoons brown sugar
  • 2 tablespoons ground cumin
  • 2 tablespoons chili powder
  • 2 tablespoons freshly ground black pepper
  • 1 tablespoon cayenne pepper
  • 1/4 cup paprika
Dutch ovens come in all sizes. I have 2 of the  12 inch sizes which are most popular. 
OR
  • 1/3 cup paprika
  • 1/4 cup sugar
  • 3 tablespoons black pepper
  • 2 tablespoons salt
  • 2 teaspoons dry mustard
  • 2 teaspoons cayenne
  • 1 teaspoon white pepper
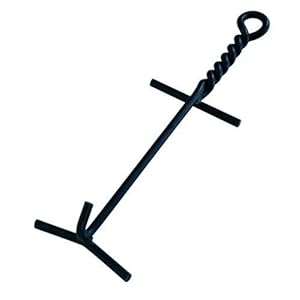
Lid Lifter for the dutch ovens...you will really NEED one of these.....
OR
You can see the fire ring has the coals in a big pot to use for the ovens.....
  • 1/4 cup paprika
  • 2 tablespoons salt
  • 2 tablespoons onion powder
  • 2 tablespoons fresh ground black pepper
  • 1 tablespoon cayenne

Here is My recipe. It tastes sweet more than spicy ...it makes about 1/2 cup of rub which is enough for my family. You can double it. 

1/4 cup brown sugar
1 1/2 Tablespoon Seasoning Salt (Lawry's or Johnny's)
1 teaspoon Chili Powder
1 teaspoon  Black Pepper
1 teaspoon Onion Powder
11/2 teaspoons paprika

Rub it all over dry ribs and let them sit 1/2 hour before cooking. Add a little bit more brown sugar ( 1/3 cup) and the rest of the dry rub an hour before you want to serve them by pouring it on top of the cooked pulled pork. I love Cattlemen's BBQ sauce over my ribs and Famous Daves Sweet and Sassy Sauce too. I would choose one of those to have on hand when the pulled pork is done.
Lodge Dutch Ovens are a very good brand. Check out my KITCHEN STORE at the top of my blog if you want some  Dutch Oven tools and cooking products. They are ones that I have in my kitchen and home. 


Dutch oven OR crock pot....pulled pork can be done either way. 
Pour a 1/4 cup of oil into your pot to start and then add the pork in 1 layer. Add dry rub if you haven't already. Then put the top on and add your coals to the top and bottom. I think most cooks will do dutch oven meats for around 3 hours.  It is like cooking them in a slow cooker crock pot. You can also DO this in a crock pot for more like 5 hours.  Either way they fall off the bone. 

We had dessert in one, potatoes with bacon and cheese in another and  pulled pork in another. The top one was just for looks. So cute, right? Dutch oven dinners are fun to do. The holder to the left is another way to put coals down for the first dutch oven. But they are really expensive.  Another way is to use a dutch oven stand. 
These are expensive and not as necessary unless you plan on doing it a lot. But they do keep the wind out of your dutch oven and the ashes out of your food! 
Use a charcoal tower to light up the coals. When they are just gray on each of the 4 edges they are ready to go. Layer about 12 underneath and 10 on top depending on your size of pot. I like the 12 inch pots. Lodge is a great brand if you want to buy one.

You can also do dutch oven in the oven with one of these  9.5 quart Dutch Ovens. But they are VERY expensive.

SEASONING YOUR NEW DUTCH OVEN 
Be sure to "season" it before using a new one. It will come with wax in the bottom of the pan. Scrape it out and wipe with a paper towel. Rub just a tiny bit of Wesson oil on the inside and outside surfaces with a rag or paper towel. Then put the lid on one rack and the pan on the other. Let it bake for an hour and a half on 450.  It will smoke your kitchen up so be prepared and open windows or your smoke alarm will go off!!  When the smoking is all gone, it is seasoned and should look more black than grey. It will continue to get seasoned as you cook with it.  Don't ever wash dutch ovens with soaps! Just rub it out with warm water and reoil it a tiny bit before you put it away or it may rust. Always let it air dry or oven dry before storing.

A close up of our finished pulled pork from a Dutch Oven.  Boy I wish I had some right NOW!! 
When they are done, pull the pork out of the pan and leave some of the sauce in the pan so you don't douse your rolls with too much liquid. Add the bottle of your favorite BBQ sauce to the pork. Then serve in a foil pan or large casserole dish and keep covered. Here are our finished pans of pulled pork from a Dutch Oven. 
Don't you want a bit of delicious Dutch Oven Pulled Pork? Buy some soft sub rolls or sandwich type rolls and add pulled pork and maybe some extra bottles of BBQ sauce on the side. So decadently Yummy either from a crock pot or dutch oven, they are both wonderful! 

Tuesday, July 3, 2012

Dutch Oven Desserts

Well doesn't this dutch oven dessert look like a keeper? Yummy. We were doing a youth activity and we made dinner for a few hundred kids last Thursday. This was the dessert recipe. It is made with yellow cake, caramel ice cream topping, sweetened condensed milk, chocolate chips and pecans.

I really loved this idea. Some guy had these dog tags on all of his dutch ovens. He and his sister who are great big campers had them attached to each and every lid and pot they had. You could really tell from a distance which dutch ovens were theirs.  

 But I didn't have those on mine and everybody's pots looked the same once you all got cooking. So this guy had a set of alphabet letter metal stampers and a bunch of washers and wire. He punched your initials into the washer and then laced a piece of wire through the washer and attached one to your lid and one to your pot handle. I could see my initials even after we were all done cooking for the day. Ingenious!
We were feeding a big crowd so the coal starter was really big, but you could go small and use those little chimney style coal starters too. Then you use your small shovel to add a few coals to the bottoms and tops of the dutch ovens when they are slightly gray on each of the corners.  That tells you they are ready to go!  

The first 3 drawers of the massive kitchen gadget drawers for camping trips.  The gal that owns these had both sets of 3 drawers pulled together with a nylon belt used for securing things in truck beds.  I loved it.  Really it was the best! 

 I took a picture of this gal's 6 drawers and all the gobs of gadgets that were packed inside.  If you are a die-hard camper like she is, you would LOVE having this kitchen away from home!!  I was thinking I would do a smaller 3 drawer version of this. It is way nice to have all your gadgets an arm's length away!
Tools you will need to do dutch oven cooking. There is a shovel, lid lifters, long handled spoons, charcoal lighter and the charcoal briquettes. And of course a few dutch ovens!! I cut off the fireplace shovel but you could bring a smaller garden shovel too. Just be sure it has a long handle so you don't burn your arms. 
This camping box was so organized!  The gal that had this camping box also has 40 dutch ovens. She has made this her life hobby. I got a lot of tips from her.  

This is how we layered our dutch ovens for cooking.  We had a main dish (pulled pork) a side dish (cheesy potatoes with onions and bacon) and a dessert (chocolate caramel cake with pecans) and the cute little one on top was strictly for looks. Isn't it cute?  These were positioned inside of this coal pot (pictured to the left). You could also put them right on the cement if you wanted, or in a stand up oven. 

You can see the ovens on the stands here.  We must have had 12 dutch ovens going here.  It was a big meal. 
 We first mixed up the yellow cake mixes and put them in an oiled dutch oven.
 We cooked the cake mixes in oiled dutch ovens for about 15 minutes. You can see the coals on the tops of the ovens.  Then after 15 minutes we added the toppings. In these desserts it was a can of sweetened, condensed milk, and a can of caramel ice cream topping.  Then we added another cake mix over the top and baked for 15 more minutes.  Then we opened up each oven and added chocolate chips and pecans for a topping and let them melt for 5 or so minutes.  Finished!

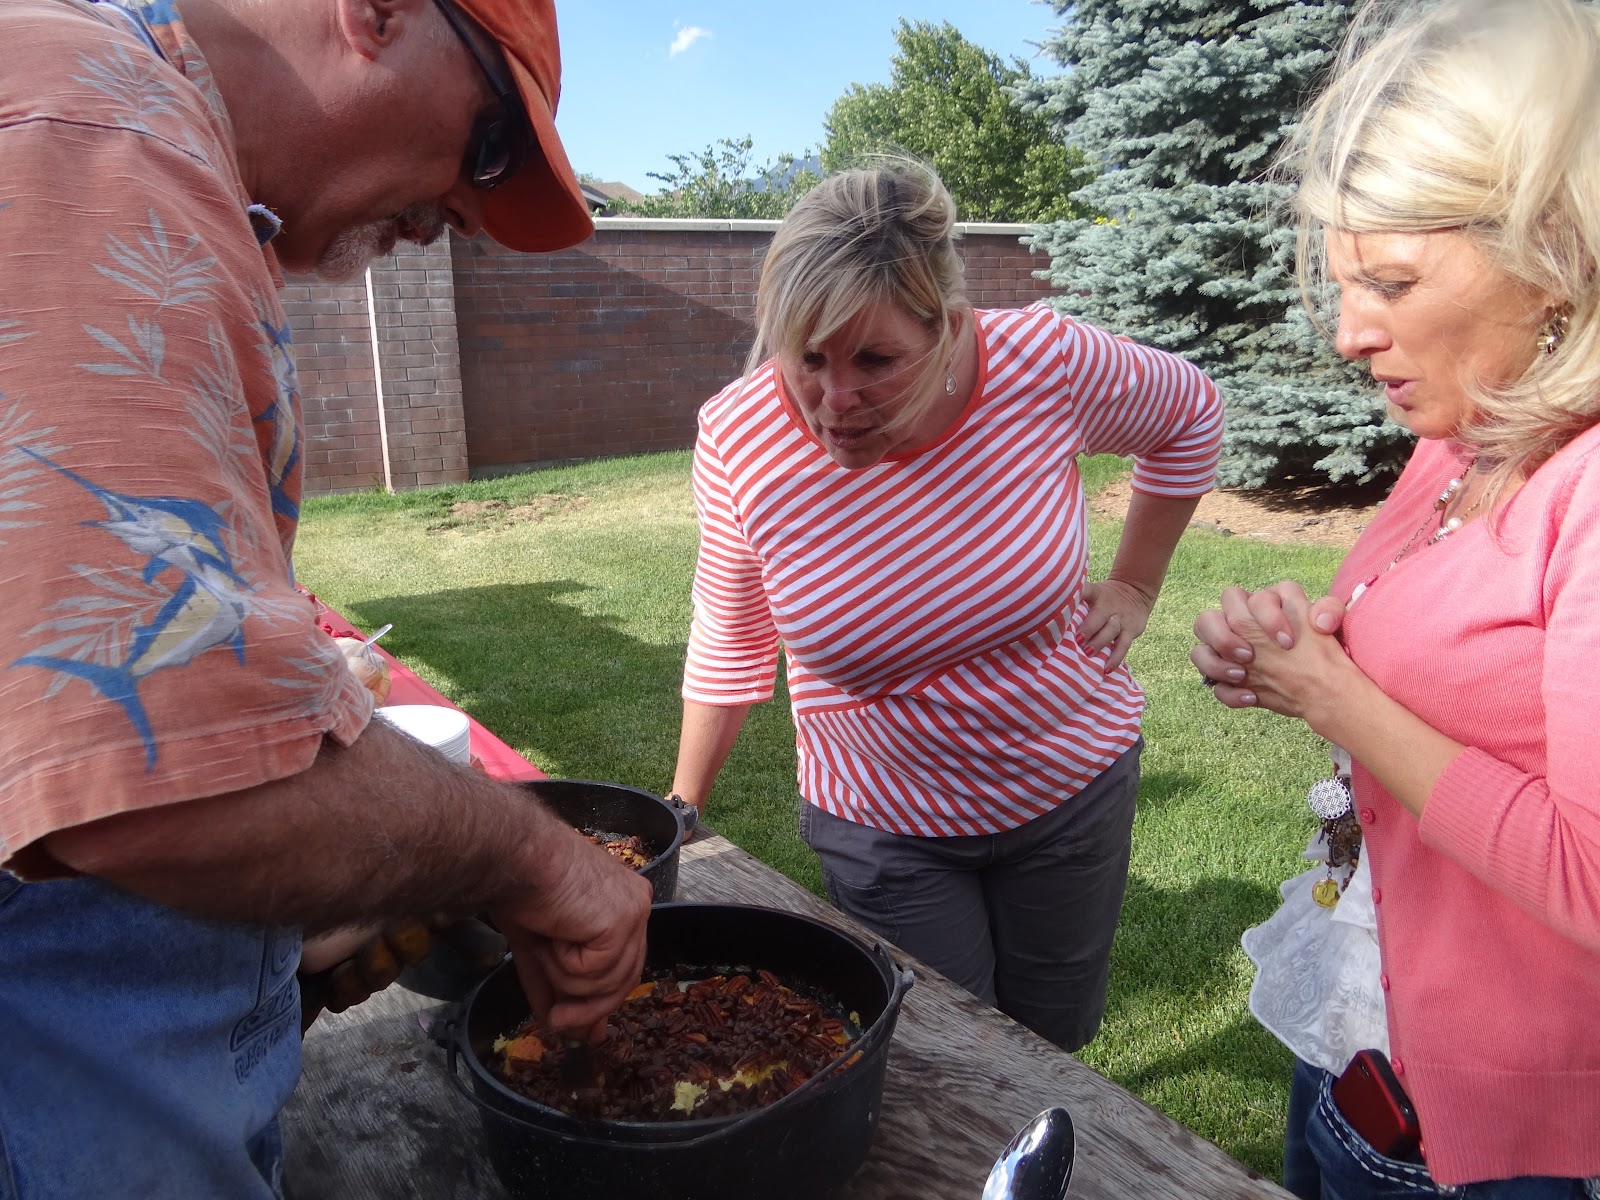
Ladies, do you want to taste test these?  Uh.....do you even need to ask?  No you don't!  Give me a bite! 
Here is the dessert almost done, we took a look and we needed that milk incorporated into the cake a bit more.....
It sure does look good now, doesn't it?  Give me that whipped cream!  
Chocolate Chip Pecan Caramel Cake
2 packages yellow cake mix mixed according to package directions
1 can sweetened condensed milk
1 small jar of caramel ice cream topping
2 cups chocolate chips
1 1/2 cups pecans 


Mix cake mixes. Pour half into an oiled 16 inch dutch oven. Bake for 15 minutes. (8 coals on bottom, 12 on top). Open up and add the condensed milk and the caramel in wavy lines over cake. Make 4-5 small slice lines through cake. Then cover again and Bake 10 more  minutes. Open and top with chocolate chips and pecans. Bake another 10 - 15 minutes or until golden. 

Here are some other easy recipes to try next time you do dutch oven cooking!  Cobblers are really easy and you really can't go wrong with them.

EASY Apple or Cherry Cobbler
2 cans apple or cherry pie filling
1/4 cup brown sugar
1 pkg. buttery yellow cake mix
1 cup pecans; chopped
1 cup (2 sticks) butter

Spread 2 cans of apple or cherry pie filling in a 12” oiled, Dutch oven. Sprinkle the sugar, then cake mix, then pecans over apples. DO NOT STIR. Slice thin the 2 sticks of butter and layer over top. Bake at 350 (8 coals on bottom 12 coals on top) for 45 minutes to 1 hour, replacing coals as needed. (you can also use blueberry filling). 


Raspberry Swirl Cake
1 cn Raspberry pie filling (large)
1 Yellow cake mix
3 Eggs
 7up or lemon lime soda instead of water in the mix
1 stick of melted or softened butter (for the oil)

Mix cake following directions using some 7up instead of water for the liquid and butter for the oil. Mix it up and add  eggs. Pour in oiled dutch oven and bake for 15 minutes (8 coals on bottom and 12 on top).  


 Mix pie filling and 1/2 can of 7up and pour in dutch oven. Carefully pour raspberries (with 7 up) over the top ( do not mix). Cook 15 to 20 more minutes checking with a toothpick after 15 minutes.  Serve cake topped with  whipped cream. You can use other pie fillings with this. 


Have fun dutch oven cooking on your next camping trip! Or just try it in your backyard. You can do it on pea gravel or on cement or on a large cookie sheet even.  Have fun with your dutch ovens! I just ran out and bought another one!!! 

Saturday, June 23, 2012

Cherry Cheesecake Squares


i love THIS DESSERT!  iT IS SO CREAMY, LIGHT AND SWEET FOR SUMMERTIME! i MAKE 2 OF THEM IN 9 x 9 inch SQUARE PANS AND TOP EACH ONE WITH A DIFFERENT FRUIT TOPPING, OR I make 1 WITH CHOCOLATE PUDDING ON TOP.  iT IS ALSO GOOD WITH STRAWBERRIES IN STRAWBERRY GLAZE. yUM! 

Yummy Cheesecake squares
Cherry Cheesecake Squares
Crust:
3/4 cup real butter, softened (1 stick and a half)
1 1/2 - cups all purpose flour

1/4 cup white sugar
3/4 - cups pecans, chopped


Filling:1 - 8oz pkg cream cheese
1 1/4 - cups powdered sugar
1 1/4 cups Cool Whip
 

1 - (21 oz) can cherry pie filling 

 (OR 1 Large package instant chocolate pudding mixed as pie recipe on box
 OR fresh strawberries in strawberry glaze for variety in toppings)

The crust for Cherry Cheesecake Squares is really yummy, like a crescent cookie...crunchy and rich...
Make the crust by mixing the butter and flour till you get pea sized bits. Add sugar slowly while mixing. Then add chopped pecans.  Press mixture into the bottom of a 9 x 13 inch pan or two 8 x 8 pans if you want to freeze one. Bake at 350 degrees for 18-20 minutes or until light golden brown.
Cherry  cheesecake squares
Use cherry pie filling for the topping on these cream cheese squares...or use strawberries with strawberry glaze in the summer if you want fresh fruit!  Both are really yummy and everybody will GOBBLE it right up! It is a hit at a pot luck too! 
While the crust is cooling mix the filling.   Mix the cream cheese and powdered sugar together using a electric mixer. Add Cool Whip to cream cheese mixture.

 
You can also make this in a 9 x 13 and it is just a little thicker dessert.  I like to do it this way so I can top it two different ways for variety. 
 The cream cheese mixture is soo yummy on these cream cheese squares...it's fun to lick the bowl! The crust layer tastes like a crescent cookie with pecans inside. Really buttery and flaky.
 When the crust is completely cooled I add the cream cheese filling on top of the crust and spread evenly. Then I top that with cherry pie filling OR chocolate instant pudding and refrigerate for a few hours until it sets up.
This is a wonderful, refreshing dessert....cherry cheesecake squares....

OR Chocolate  cheesecake squares....either one is a favorite of mine....
Chocolate  cheesecake squares....mmmmm....

 Yummy layers of rich, creamy sweetness!


 Chocolate  cheesecake squares....same recipe, just different toppings....I just used mini hershey bars and Hersheys kisses and a paring knife to make the chocolate curls on top of Cool Whip.

Top it with some chocolate pudding, Cool Whip and some chocolate curls for garnish...or a strawberry! (That weird pink thing is my finger under the plate, lol.... looked like an alien or something on the plate!! EEK! 


I brought this to a BBQ today for my little 2 year old granddaughter's birthday party. 
She is such a sweetie!  She loved her little tea set and Brown Bear, Brown Bear book and her Winnie the Pooh cake and balloons.  So sweet. 
Grandma and Josie hanging out at her Birthday Party! She still has a little shiner
from falling down at the docks at Lake Powell last week. She's a tough cookie though.... 

LinkWithin

Related Posts Plugin for WordPress, Blogger...